Unit Creator Advanced Guide
This is an advanced guide to making units that you would otherwise be unable to with the standard unit creator without the use of mods such as the Unit Creator Mod. This guide assumes that you are already familiar with using the unit creator as described here.
The advantages of advanced unit creation include:
- Access to hidden unit bases and abilities.
- The ability to override the maximum clothing and ability limits.
- Access to hidden unit and item stats, allowing you to make wholly new looking units.
A complete list of IDs is very useful for making full use of this guide. They can be found here.
Note: If editing unit files as described in this guide, and you play on Steam, you may want to consider setting your profile to invisible so as to avoid spamming your friends list with notifications every time you launch the game.
Getting Started
In order to make advanced units, you must first create a unit in the unit creator. What you add to the unit initially isn't too important, but may matter depending on what you are intending to do with it. Once you have your unit saved, close the game and go into the game's files. On Steam, these can be accessed by right-clicking on the game, and then selecting Manage -> Browse local files. Then, in your file explorer, go to TotallyAccurateBattleSimulator_Data -> CustomContent -> CustomUnits, then sort by date modified to find the most recent unit. The name will just be a hyphen followed by a string of numbers, don't worry about this. Now open the unit's folder, and finally open its text file in Notepad.
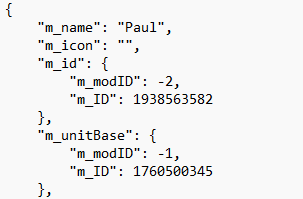
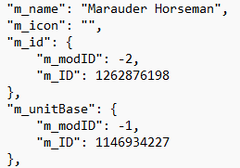
Here you can see the start of the text file for a unit called Paul. "m_name" sets the name for the unit, which will be whatever you named the unit when you created it in the unit creator. "m_ID" is the unique ID of the unit (which appears to follow "m_modID" as the unit's file name). You should not need to touch this.
Next, under "m_unitBase", we find "m_ID". This determines the unit base (wobbler, mammoth, wheelbarrow etc.) that the unit will use. More on this later.
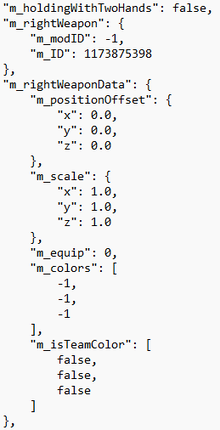
Next we have the unit's weapons. "m_holdingWithTwoHands" must be set to either true or false, and determines whether the weapon is held in one hand or two. Under "m_rightWeapon", "m_ID" sets what the weapon actually is, be it a bow, knife, or any other weapon. Under "m_rightWeaponData" there are a number of stats, but the only ones we need to worry about are the colour stats, "m_colors" and "m_isTeamColor". More on these later. This section is then repeated for the left weapon.
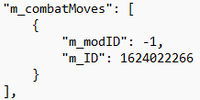
Following the weapon data is "m_combatMoves". These are the unit's abilities, where "m_ID" defines which ability it is. You can only apply five abilities to a unit in the unit creator, but by adding additional abilities in the unit's file, you can bypass this limit.
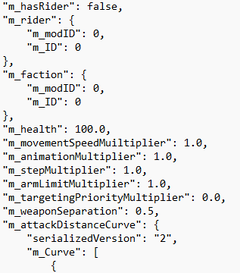
Next up are a whole load of stats and values. "m_hasRider" and "m_ID" under "m_rider" determine if the unit has a rider, and if so, who it is based on their unit ID (shown earlier). The unit can also be added to a faction, as seen under "m_faction". Paul currently has no rider or faction.
The unit's health and movement speed are given next, followed by a number of hidden stats. The effects of these hidden stats have yet to be explored by us at the time of writing this, but presumably "m_targetingPriorityMultiplier" can be altered to make the unit more or less likely to be targeted by enemies. For the most part, you shouldn't need to change these stats.
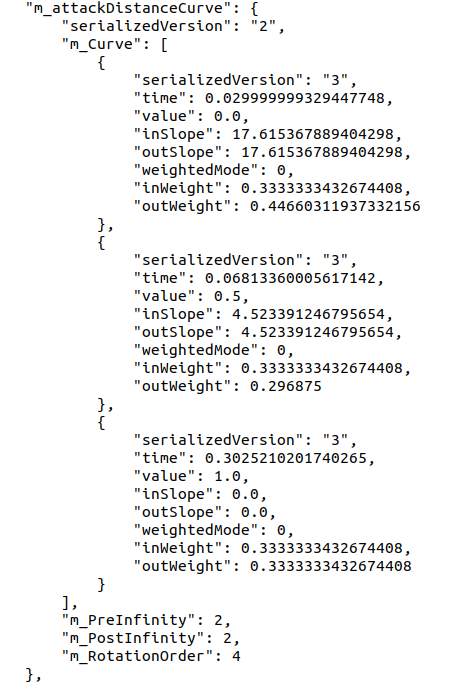
"m_attackDistanceCurve" controls the path of a units attacks. This is only really useful for melee units. The 3 parts to the attack path on the left are the default after giving a unit the squire sword held in both hands.
- "time": The point in time after the attack is initiated when these parameters should be met.
- "value": Not properly tested yet.
- "outSlope": Controls the intended travel speed away from the unit.
- "outWeight": Controls how much force is put towards "outSlope".
- ""inSlope" ": Controls the intended travel speed towards the unit.
- "inWeight": Controls how much force is put towards "inSlope".
- "weightedMode": Not properly tested yet.
These same curve stats can be applied to a units "m_turnSpeedCurve" as well.
After this subsection are the unit's mass (i.e weight) and size multipliers, as seen in the unit creator.
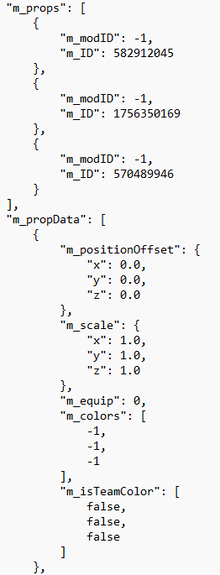
Next, you'll see "m_props", which define the unit's clothes. Each clothing item has its own "m_ID" defining what it is, and then its own "m_propData" section which defines further details about the clothing item. We'll revisit this in detail later.
After this, we have some details defining how the unit turns around. While there are other optional parts to this, we’ll focus on how "m_turnSpeed" can be useful for adjusting how fast a unit turns around.
The unit then has a movement and targeting type, which are best edited in the unit creator rather than here as the code gets a little complex.
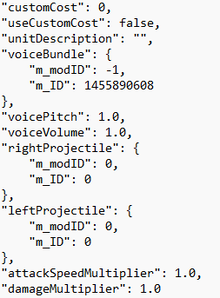
You can then set the unit's cost and description, and finally the last few stats of the unit. "voiceBundle"'s "m_ID" allows you to choose the voice of a unit, and "voicePitch" and "voiceVolume" alter their pitch and volume respectively. Finally, you can set custom projectiles for the unit's ranged weapons (if it has any) using the "m_ID"s of the projectiles you want, and then the unit's overall attack speed and damage values can be chosen.
Now that you've seen the whole file, you can probably start to tinker with how your units look and work. Once you're finished, simply save the file and relaunch the game, and your changes should be applied. Some changes may be reverted if you look at your unit in the UC, but if you just deploy your unit on the battlefield it should all work. Any changes that are reverted will become permanent if the unit is saved in the unit creator, and you'll have to reopen the file and edit those values again.
Editing Unit Bases
You should now have a good feel for the layout of your unit's file. Let's use this to start making new units.
The biggest change you can make to a unit is to change its unit base. The unit base determines what model the unit is based off of. When you make a new unit, chances are you'll have chosen the wobbler base, so when you look at the unit's file you'll see it has the unit base ID 1760500345. Let's say though that you want to make your unit into a horse. Simply find the ID for the horse unit base from the list of unit bases, and replace the "m_ID" value with the new ID. I'll go through making a horse in more depth later, but for now, there are some things you need to know about editing unit bases.
First of all, as with all of the IDs you'll use when editing units, it is vitally important that you get the exact ID right. Invalid IDs can result in severe bugs, particularly in the case of unit bases, so if you encounter any weird bugs after editing unit files, make sure to go back and check your files for things like incorrect unit base IDs. Make sure to copy and paste a lot so that you aren't making typos.
When making units with different unit bases, it is important to note that trying to give the unit clothes is unlikely to work unless their unit base is close to that of a Wobbler. This is because clothing items are linked to certain body parts, but not all unit bases have the same body parts available. This means that giving clothes to, say, a mammoth will not actually apply the clothes to the mammoth. Rather, they will probably just appear in the centre of the map, or somewhere else that you don't want them. The exceptions to this are clothes specifically designed for that unit base, i.e. horse armour, mammoth hair, the ice giant's belt etc. You can find these in the list of IDs.
It's also worth noting that many unit bases expect to have riders, for example horses and artillery pieces. Using these units without riders may have unexpected results. When making these units, it is almost always the case that the humanoid character rides the non-humanoid character, not the other way around. In the case of chariots, the horse rides the chariot, but we currently know of no way to give the actual chariot a human rider.
You should also be aware that different unit bases come with some of their own behaviours that will affect how they work on the battlefield even if they haven't been edited in any other way. For example, mammoths come with their own explosive trample damage (it isn't an ability), and horses will always try to charge at the enemy, even if you give them a ranged weapon.
Finally, we ought to mention that altered unit bases probably won't display if you look at your unit in the unit creator. Saving a unit in the unit creator will revert its unit base (and also its turning speed), and you'll have to go back into its file and reapply your changes.
Example: Making a Horse Unit
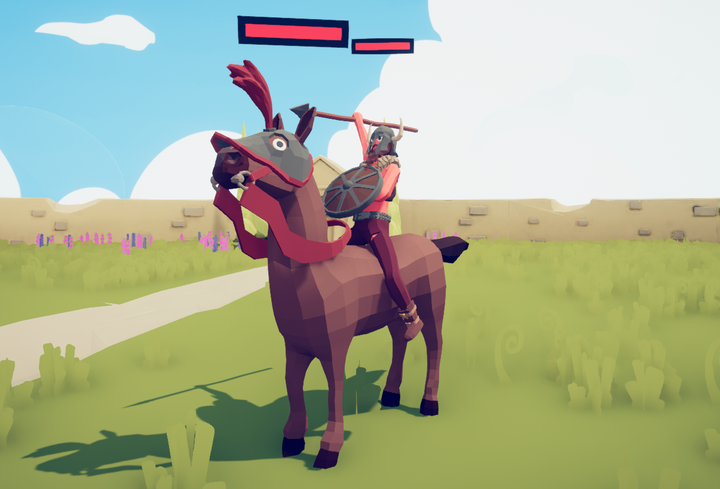
So, you want to make a horse unit. Hopefully you read the section on editing unit bases, and you can now make a unit whose unit base is that of a horse. We’re going to do this with a unit called the Marauder Horseman as an example.
This Marauder Horseman unit now has the unit base ID of a horse. What does that mean? This unit now looks like a horse, but it won't necessarily act quite like a horse. Firstly, weapons aren't really needed for a horse, and equipping them might not even work (but by all means give it a go). What our horse does need, however, is trample damage. All cavalry units in TABS do some form of trample damage, and this is achieved through hidden abilities referred to as Move_SpeedExplosions. To use these abilities, either change the ID of a previously applied ability, or type in new code to the file. There are multiple SpeedExplosions abilities, one for each unit with trample damage in the base game, so either play around with them or just try to match the ability with the unit base that you chose.
Next, we ought to adjust our horse's stats. 500 - 900 health is a good amount for a horse, depending on how tough you want it to be. Movement speed should be changed to around 2.50x to make the horse actually move with some haste. Weight isn't too important, but Landfall seems to lean towards 10.0x. Size should be 1.0x to 1.2x, and for horses, it's worth adjusting their turning speed ("m_turnSpeed") to around 20.0 to stop them from spinning around too fast.
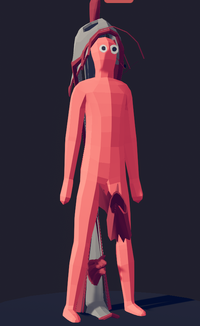
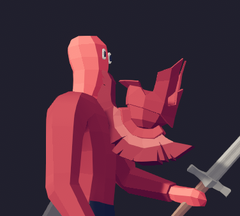
Now, we may want to give our horse some armour. As normal clothes don't work for inhuman unit bases, we will need the hidden horse clothes. Try pressing Ctrl + F on the list of IDs and searching for 'horse'. You should find a number of clothing items in the Renaissance section designed specially for horses. If you want to recolour these, you can do it in the unit's file (more on that later), or you can launch the game and edit the colours in the unit creator. If you do this, your unit will look something like the image on the left. Notice that by going into the unit creator, the unit has ceased looking like a horse. If you save your unit now, you will need to go back to the file and reapply the changes to the unit's base and also its turning speed. You probably ought to give your horse a rider while you're here, though you can also do that in the file.
Hopefully, you now have a functioning horse unit. How will you test it without going into the unit creator? Just add it to a faction, and you should be good to go!
Editing Weapons and Clothes
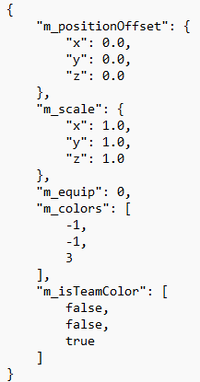
Now that you should be comfortable with editing unit bases, we can more on to some even more advanced techniques. If you look at the details of each weapon or clothing item that your unit has, you'll notice a number of different values. Firstly, "m_colors" gives the colour of each piece of the item. Which piece is which you will have to determine by looking in the unit creator (which is where you should be changing colours anyway). Note that -1 sets the colour to be whatever is the default for that item, and that the colour you see will be different if "m_isTeamColor" is set to true.
Now we can move onto "m_positionOffset" and "m_scale". As far as I'm aware, changing these stats will only have an effect if the item is a static clothing item. What does this mean? It doesn't work on weapons, or clothes that touch more than one part of the unit's body (upper and lower torso count as seperate parts). If the item touches more than one part of the body, then it technically has to be able to move (i.e. it isn't static), and the stat changes won't get applied.
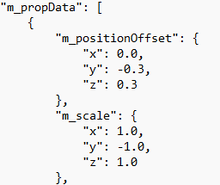
Assuming you've managed to find an item of clothing that works, you can start to mess around with the values. Changing the scale allows you to resize the item, and you can even flip it by making the value negative. It's worth mentioning at this point that, from the unit's point of view, z is forward-backward, y is up-down, and x is right-left. If you change the offset, this will move the object with respect to the part of the body that the item is attached to.
If you look at the stats for this helmet, you can see that I've moved it down and forwards, and then flipped it upside-down as seen in the next image. Just try playing around with some of the different items and see what you can come up with.
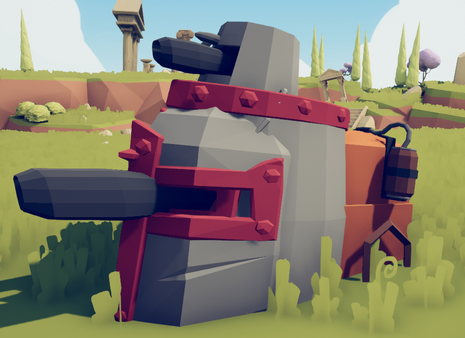
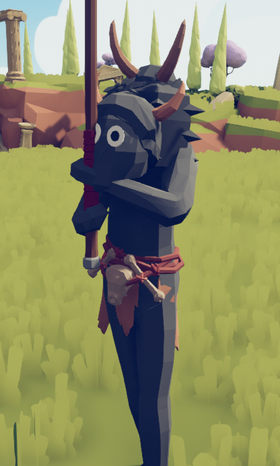
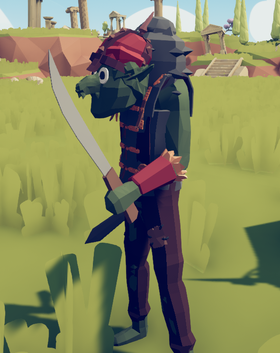
Here are some examples of units made with these techniques - see if you can work out how they were made.

